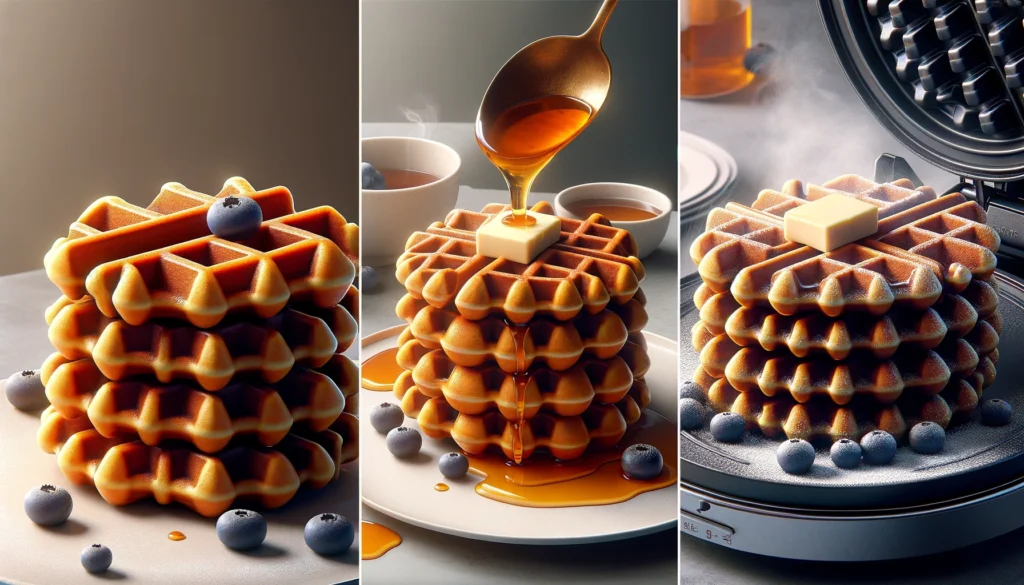
Sweet potato waffles offer a delectable twist to traditional waffles, presenting a nutritious alternative packed with flavor and health benefits. Made from sweet potatoes, these waffles boast a rich, sweet taste and a delightful, fluffy texture. They are not only a delicious treat but also a fantastic source of essential nutrients, including vitamins A and C, fiber, and potassium.
What makes sweet potato waffles truly remarkable is their versatility. While they can be enjoyed as a sweet breakfast dish topped with maple syrup, fruits, or whipped cream, they also excel in savory applications. Pair them with fried eggs, avocado, and salsa for a savory breakfast or brunch option, or use them as a base for creative sandwiches. Their natural sweetness adds depth to both sweet and savory dishes, making them a culinary delight for any meal of the day.

Ingredients:
- Sweet Potatoes: You’ll need about 2 medium sweet potatoes, which should yield roughly 2 cups of mashed sweet potato.
- Flour: Use 1 ¾ cups of all-purpose flour for the batter. If you’d like, you can also opt for whole wheat flour or a gluten-free flour blend.
- Eggs: You’ll need 2 large eggs to bind the ingredients together and add structure.
- Milk: Use 1 ¾ cups of milk. You can use any type of milk you prefer, such as cow’s milk, almond milk, or soy milk.
- Baking Powder: Use 1 tablespoon to help the waffles rise and become light and fluffy.
- Salt: Add ½ teaspoon to enhance the flavors in the waffles.
- Cinnamon: Use 1 teaspoon for a warm, cozy flavor that complements the sweet potato.
- Nutmeg: Use ½ teaspoon to add a warm, slightly sweet flavor.
- Vanilla Extract: Use 1 teaspoon to enhance the overall flavor of the waffles.
- Butter: Use ¼ cup of melted butter for a rich, buttery taste. You can also use oil or a dairy-free alternative.
Equipment:
- Waffle Maker: You’ll need a waffle maker to cook the sweet potato waffles. Look for a waffle maker that can make Belgian-style waffles, as the batter tends to be thicker than regular waffle batter.
- Mixing Bowls: You’ll need a few mixing bowls to combine the ingredients.
- Whisk: Use a whisk to mix the batter until smooth.
- Measuring Cups and Spoons: You’ll need these to measure out the ingredients accurately.
- Vegetable Peeler: Use a vegetable peeler to peel the sweet potatoes before cooking.
- Potato Masher or Fork: Use a potato masher or fork to mash the cooked sweet potatoes.
- Spatula: Use a spatula to remove the cooked waffles from the waffle maker.
- Wire Cooling Rack: Use a wire cooling rack to cool the waffles before serving.
- Waffle Tongs: Use tongs to remove the waffles from the waffle maker without damaging them.
When choosing a waffle maker for this recipe, look for one with deep pockets to accommodate the thick batter. Belgian-style waffle makers are ideal, as they produce thicker, fluffier waffles that can hold up to the denser texture of the sweet potato batter. Non-stick plates are also recommended to prevent the waffles from sticking and to make cleaning easier.

Step-by-Step Cooking Process for Sweet Potato Batter:
Prepare the Sweet Potatoes:
First, wash and scrub the sweet potatoes thoroughly to remove any dirt. Using a vegetable peeler, peel the skins off cleanly. Once peeled, cut the sweet potatoes into chunks. Smaller chunks will boil faster and more evenly.
Boil the Sweet Potatoes:
Place the sweet potato chunks in a large pot and cover them with water. Heat the water to a boil over medium-high heat.. Reduce the heat to low and let the sweet potatoes simmer until they are tender, about 15-20 minutes. Test the tenderness by inserting a fork into the sweet potatoes; they should be soft and easily pierced.
Drain and Cool:
After the sweet potatoes are fully cooked, drain them in a colander and let them cool slightly. It’s important to avoid using cold water to cool them down quickly as this can affect the texture of the mash.
Mash the Sweet Potatoes:
Transfer the cooled sweet potatoes to a large mixing bowl. Use a potato masher or fork to mash them until they are smooth and free of lumps. Alternatively, you can use a food processor for a smoother consistency.
Add Remaining Ingredients:
Now that your sweet potatoes are mashed, you can add additional ingredients depending on your recipe needs. This might include butter, seasonings, or other enhancers for flavor. If you’re looking for inspiration, check out our guides on flavorful additions to your mashed sweet potatoes.
By following these steps, you’ll have perfectly prepared sweet potatoes ready to be used in various dishes, from morning pancakes to savory dinner casseroles.
- 1 cup all-purpose flour
- 2 teaspoons baking powder
- 1/2 teaspoon salt
- 1/2 teaspoon ground cinnamon
- 1/4 teaspoon ground nutmeg
- 1/4 teaspoon ground ginger
- 2 tablespoons brown sugar
- 1/2 cup milk (you can use dairy or non-dairy milk)
- 2 large eggs
- 2 tablespoons melted butter or oil
- Mix Well: Stir the ingredients together until they are well combined and form a thick batter. Be careful not to overmix, as this can result in tough pancakes.
- Preheat the Griddle or Pan: Place a griddle or large skillet over medium heat and let it preheat. Lightly grease the surface with butter or oil.
- Cook the Pancakes: Spoon the batter onto the hot griddle or skillet, using about 1/4 cup of batter for each pancake. Cook the pancakes for 2 to 3 minutes, or until bubbles appear on the surface and the edges become firm..
- Flip and Cook: Carefully flip the pancakes with a spatula and cook for an additional 1-2 minutes, or until they are golden brown and cooked through.
- Serve: Serve the sweet potato pancakes warm with your favorite toppings, such as maple syrup, whipped cream, or chopped nuts.
Tips for Perfect Texture and Doneness:
- Be sure to mash the sweet potatoes thoroughly to avoid lumps in the batter.
- Use a hot griddle or skillet to ensure even cooking and a nice golden brown color.
- Avoid overmixing the batter, as this can make the pancakes tough.
- Cook the pancakes over medium heat to prevent burning and ensure they cook through evenly.
- Keep an eye on the pancakes while cooking and adjust the heat if necessary to prevent them from burning.
Nutritional Information
The Health Benefits of Sweet Potatoes
Sweet potatoes are a powerhouse of nutrients, offering a range of health benefits. One of their standout features is their high vitamin A content, with just one medium sweet potato providing over 100% of your daily recommended intake. Vitamin A is essential for maintaining healthy vision, skin, and a strong immune system.
Sweet potatoes are also rich in fiber, which aids digestion and promotes satiety. They’re a good source of vitamin C, vital for immune health, and contain several B vitamins that support energy metabolism.
Nutritional Comparison: Sweet Potato Waffles vs. Regular Waffles
Comparing sweet potato waffles to traditional waffles reveals some interesting differences in nutritional value. Sweet potato waffles are likely higher in fiber and vitamin A due to the inclusion of sweet potatoes. They also offer a unique flavor profile, with a subtle sweetness from the sweet potatoes.
Regular waffles, on the other hand, may be higher in refined carbohydrates and lower in fiber and other nutrients. However, exact nutritional values can vary based on the specific recipes used.
Traditional and Creative Toppings:
Traditional: Classic toppings for English muffin pizzas include marinara sauce, mozzarella cheese, pepperoni, and Italian seasoning. For scrambled egg tortillas, consider toppings like cheese, salsa, avocado, and sour cream.
Creative: Get creative with your toppings! For English muffin pizzas, try BBQ chicken with red onions and cilantro, or pesto with sun-dried tomatoes and feta cheese. For scrambled egg tortillas, consider adding spinach, mushrooms, bell peppers, and onions for a veggie-packed meal.
Modifying for Different Diets:
Gluten-Free: Use gluten-free English muffins or tortillas. Ensure all other ingredients are gluten-free, including seasonings and toppings. Check labels carefully, as some ingredients may contain hidden gluten.
Vegan: For English muffin pizzas, use vegan cheese or a cashew cheese sauce, along with your favorite plant-based toppings like vegan pepperoni or sautéed veggies. For scrambled egg tortillas, replace the eggs with a tofu scramble seasoned with turmeric, nutritional yeast, and black salt for an eggy flavor.
Low-Carb/Keto: Use low-carb tortillas or English muffins, and opt for toppings like meats, cheeses, and low-carb veggies such as spinach, mushrooms, and bell peppers. Be mindful of the sauce you use, as some may contain added sugars.
Dairy-Free: Use dairy-free cheese or skip the cheese altogether. For a creamy element, try adding mashed avocado or a dairy-free cheese alternative.
Nut-Free: Avoid toppings like pine nuts or any nut-based cheeses. Stick to nut-free sauces and ingredients.
Best practices for storing and reheating waffles to maintain freshness and texture.
To store waffles properly and maintain their freshness and texture, follow these best practices:
- Cool Completely: Allow waffles to cool completely at room temperature before storing to prevent condensation.
- Store in an Airtight Container: Place waffles in an airtight container or a resealable plastic bag to prevent them from drying out or absorbing odors from the fridge.
- Refrigerate or Freeze: For short-term storage, refrigerate waffles for up to 2-3 days. For longer storage, freeze them.
- Freezing Waffles: To freeze, place waffles in a single layer on a baking sheet and freeze until firm. Then, transfer them to a freezer bag or airtight container, placing parchment paper between layers to prevent sticking.
- Thawing Waffles: To thaw frozen waffles, remove them from the freezer and let them sit at room temperature for about 10-15 minutes. Alternatively, you can reheat them directly from frozen.
- Reheating Waffles: To reheat waffles, use a toaster or toaster oven for best results. You can also use a conventional oven preheated to 350°F (175°C) for 10-15 minutes or until heated through. Avoid using the microwave, as it can make waffles soggy.
FAQs
Can I make this recipe gluten-free?
Yes, you can easily make these pumpkin pancakes gluten-free by using a gluten-free flour blend instead of regular flour. Look for a gluten-free flour blend that is suitable for baking, as some blends may have a different texture or flavor that could affect the final result. Additionally, ensure that any other ingredients you use, such as baking powder or spices, are also gluten-free.
What type of sweet potatoes should I use?
For this recipe, you’ll want to use cooked, mashed sweet potatoes. You can use any variety of sweet potato, such as orange or white sweet potatoes. Choose sweet potatoes that are firm and without any soft spots. To cook them, you can bake, boil, or steam them until they are tender enough to mash easily with a fork. Allow them to cool before mashing and using in the pancake batter.
Can I use canned pumpkin instead of sweet potatoes?
Yes, you can substitute canned pumpkin puree for the mashed sweet potatoes in this recipe. Use the same amount of canned pumpkin puree as you would mashed sweet potatoes. Make sure to use plain pumpkin puree and not pumpkin pie filling, which contains added sugars and spices that could alter the flavor of the pancakes.
How can I make these pancakes vegan?
To make these pancakes vegan, you can use a plant-based milk such as almond, soy, or oat milk instead of cow’s milk. You can also use a vegan egg substitute or flaxseed egg in place of the egg. To make a flaxseed egg, combine 1 tablespoon of ground flaxseed with 3 tablespoons of water and let it sit for a few minutes to thicken before adding it to the batter.
External Links:
For a guide to making sweet potato waffles, you can find a variety of recipes and tips online. Here are some helpful resources:
- All Things Mamma offers a recipe for fluffy sweet potato waffles, which emphasizes the use of sweet potato as a healthy ingredient that adds extra vitamins and minerals to your meal. The site also discusses the recipe’s ingredients and methods in detail. For more information, you can visit All Things Mamma.
- FeelGoodFoodie provides a simple low-carb sweet potato waffle recipe that is also calorie-conscious, making each waffle only 80 calories. The recipe includes ingredients like oats and almond milk, contributing to its health benefits. Check out FeelGoodFoodie for the full recipe and additional nutritional tips.
- Easy Healthy Recipes highlights a paleo version of sweet potato waffles that can be customized to be either sweet or savory. This recipe focuses on using whole, healthy ingredients. For step-by-step instructions, visit Easy Healthy Recipes.
- The Kitchn provides a detailed recipe that includes the use of buttermilk for flavor and a combination of sweet spices. This recipe is great for those looking to explore flavor variations and also includes tips for freezing the waffles for quick breakfasts. More details are available on The Kitchn.
These resources should give you a comprehensive guide to making sweet potato waffles, including various tips on ingredients, cooking methods, and how to serve them.

